One Platform, hundreds of solutions
Our innovative products create an ecosystem that boost productivity, improve customer engagement, and drives innovation.

Digital Signage
Enterprise Software, specifically designed to create and manage content that engages, informs, and entertains your customers.

Meeting Room Management
Let’s get back to business, CE Labs is reimagining the office space with innovative meeting room solutions.

Queue Management
Whether you are managing a waitlist or coordinating a Queue, we have a guest management solution for you.

Visitor Management
From corporate lobbies to college campuses, visitor registration and tracking has never been easier.

Video Conferencing
Envision work without boundaries, let us help you build a video conferencing solution!

OTT Streaming
Commercial Streaming is here. CE Labs hardware supports streaming services designed specifically for businesses.
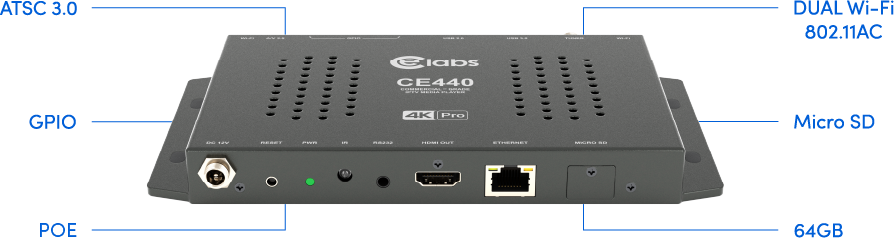
4k Innovation is here
The CE440 media player combines ultra 4k video quality with true commercial grade performance.